Wednesday 19 February 2020

CAT ON A HOT TIN ROOF

With a previous build (The pig sheds) I used bought corrugated sheets for the roofing.


Now while an excellent product, they worked out quite expensive which got me thinking, why not make your own.  So here is how I set about it.

I started by making a jig/former as I intended using heavy kitchen foil for the sheets..I cut two pieces of hard board 40 x 18 (the size of one of the sheets I had bought)

Next I glued a strip of plywood 3 x 3 in section along one edge of one of the pieces of hardboard.


with this done I glued a corrugated sheet to each of the pieces of hardboard

Now I cut a piece of kitchen foil the size of the sheets (40 x 18) and placed it on the bottom former tight up against the 3 x 3 edge stop.

Now I positioned the second former on top and against the edge stop

All that was left to do was to apply pressure on the two formers between my thumb and finger and hey presto,  corrugated sheet.

I proceeded to produce several more corrugated sheets and then glued them to a sheet of cardboard to see how they performed and looked.  By the way the kitchen foil I used was re-cycled from our Sunday roast so was quite badly creased but the 'pressing' did the job.


So matt black paint and a few rust streaks and I think it will pass as an industrial factory fence.
So there you go, how to make your own corrugated sheeting for next to nothing cost wise so happy bunny!  Till next time
don't bang 'em about
Blossom


Saturday 15 February 2020

POWER TO THE PEOPLE

Having completed the pig facility, I have turned my attention to the power station.  I have started with my interpretation of the sub-station which transfers the power to the grid.  I started by examining images on the net to get some ideas and this is what I've come up with.  Whilst not probably correct it works for me.

the idea started when I was looking for some rawl plugs to re attach a curtain rail and while I was in my biscuit box of rawl plugs I noticed these very large plugs I had acquired from somewhere and thought those look like the insulators they use in sub stations, so eight were put to one side in my jomlet box of modelling odds and ends.


I started with the base for which I used a piece of plasticard 250 x 70 onto which I glued sand to give it some texture, when this was dry I painted it with a coat of Ivory satin gloss.  When this was dry I dry brushed dark brown, picking out the high spots to give the appearance of large gravel.

Next to the transformer base which is made from cardboard (I keep all suitable old Christmas and birthday cards) It had an angled top so that when the 'insulators' were glued on they had the right angles. The oil cooler tank was made by gluing together two plastic tops off small bottles.  I also purchased a 3D printer cut switch ox, cabinet and transformer off Ebay and fixed them on the end


The power cables connected to the tops of the 'insulators' have been left long for as yet I do not know how far to the frames.


Overall I am quite pleased with the results, so till next time
don't bang 'em about
Blossom


Thursday 30 January 2020

HAPPY AS A PIG IN SH*T

As previously stated, Palethorpes had a pig handling facility where pigs would arrive by train to be stored in sty's until needed.


As can be seen from this 1935 photo.  At this time there was only one pig shed and the siding rail link had not been added.  It is on this I have based my pig sheds.  The main Palethorpes factory is just out of view top left.

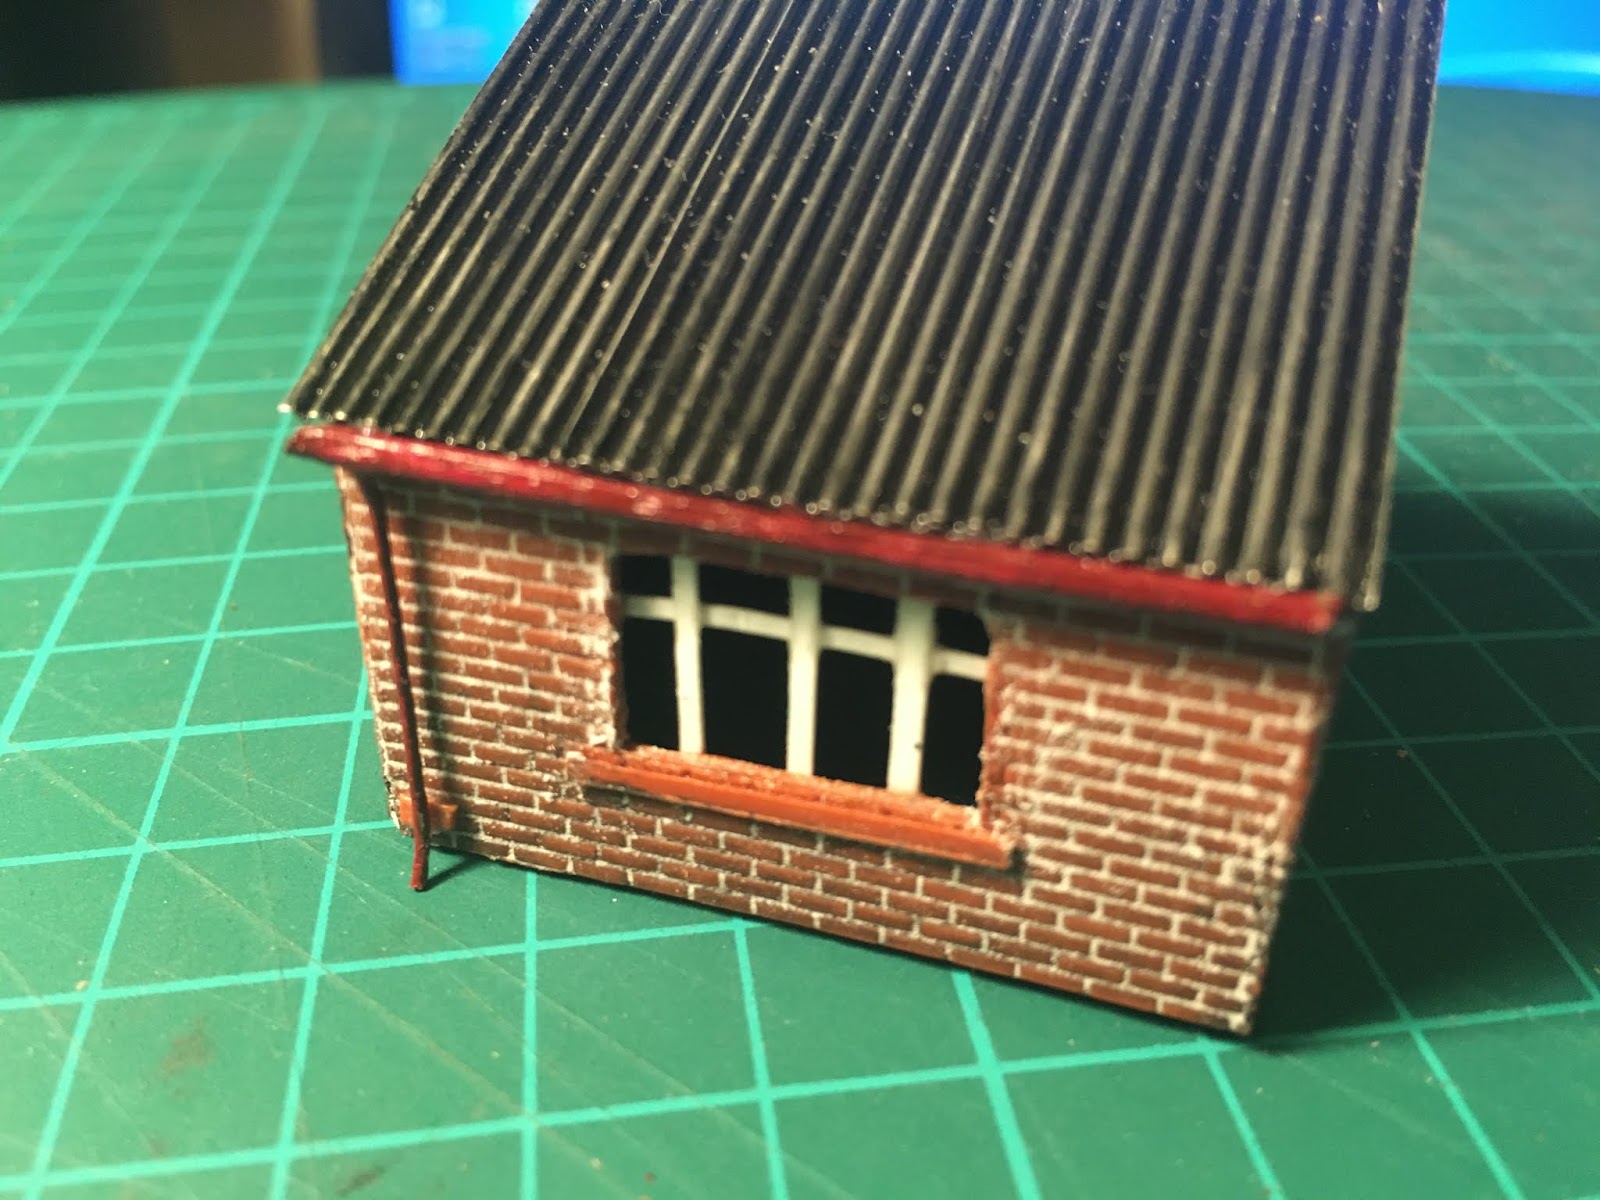
I started by cutting a wooden base and cladding the outside with Wills brickwork sheets which were weathered with a wash of black pain at the foot of the walls, in the same way I had done to the small workman's shed.


Next the motar was added by rubbing in ready mixed tile grout then gently wiping off excess with a damp cloth. Then the supporting ironwork was picked out in black


Now my attention was turned onto the shed itself. I started by cutting out the ends and sides from Wills wooden planking, then a wash of weak black paint rubbed on with a cloth.  Next a sliding door was made and ironwork fitted including the sliding track.


Next I cut pieces of styrene sheet to fit to the inside of the panels to act as a fixing point for the floor and roof. These were glued in position leaving a 5mm gap at the bottom and just 2mm gap at the top (the thickness of the roof sheets.


I followed this by cutting styrene for the base and the two roof sections.  The sides and ends were now glued together then one of the roof sheets fitted and glued followed by two angled supports for the roof which were also glued to the one side of the roof.  After this was fitted, then the second roof section was added. 

 The next job was quite tedious, fitting the corrugated sheets to the roof.  I was not too carefull as I wished the finished result to represent a roof that been up a long time and in need of repair.


With all the roof sheets in place I added two ventilators then gave the roof two coats of matt black followed by adding 'rust by randomly painting some of the joints with red oxide paint then dragging down with a dry brush.


Happy with the result, I produced the second pig shed and here are some shots of the completed buildings.


Well that's the pig handling facility finished.  At a later date I will be producing a factory to represent Palethorpes model factory, but until then I will continue with other parts, so till next time
don't bang 'em about
Blossom

Monday 27 January 2020

A MAN WITH A VAN

Palethorpes was a large employer in Tipton having its 'Model Factory' based there where prime pork was turned into mainly sausages and pork pies.  The supply of pork was stored about half a mile away where they had their own sidings, goods station and pig pens. As this facility was at the end of my street, I would regularly see large vans delivering to the goods station where boxes were loaded onto awaiting trains usually made up of six wheeled wagons

One of the sidings led off to between two pig sheds where the pigs would be delivered by 'pig' trains using wagons similar to the hornby Prime Pork wagons


Anyway I digress, I had decided that I would need a suitable van for the purpose of travelling between t6he Model Factory and the pig storage facilities so I bought a Lledo 1937 Mayflower Trading model off Ebay as my basis for the Palethorpes van


I started by giving the whole model a rub down with 280 wet & dry to remove the existing decals and to give the paint a good key.  After this I gave the van two coats of Humbrol Acrylic paint in Crimson Lake, which is the colour Palethorpes used, and also covered the roof with a weak wash of black.  I had also purchased a set of waterslide transferes designed to adorn a railway wagon but seemed right for the van. 


With these attached I think the van looks right for the 'Palethorpes section of the layout, which as I say is at least 12 months away.
so that's it until next time when I will be starting on the pig sheds, so till then
don't bang 'em about
Blossom.

Sunday 26 January 2020

FIRST ATTEMPTS

As I am relatively new to all this I know it will be a rapid learning curve and no doubt I will make many mistakes along the way so please bear with me.

Many years ago, when I was a young boy, like many I had a small train set and layout in my bedroom at home.  It was about 4'-6" square and mounted on top of the box in the 'box room'  It consisted of a single oval with a tunnel with a branch which split into two and went to a terminus station. The hills were paper mache  and the trees were painted sponge stuck onto wooden trunks.  It was a Trix twin (3 rail) with one 4-6-0 Fowler loco with a goods train and a set of three carriages.  All of the buildings on the layout were Airfix plastic kits and so I have no experience of scratch building. 

Knowing it is going to be at least 12 months before I break into the loft never mind building the baseboards, I decided to have a go at making some of the buildings and accessories.  I started by scouring the internet and you tube looking at lots of varying techniques, and made the decision that I did not like card building as they appeared flat with little detail, so I decided where I could I would have a go at scratch building. I chose to start with a very simple building group at Palethorpes pis storage facility (which just happened to be at the end of my road and a place us kids played.

There was going to be two pig sheds with wagon unloading and a small workers shed affixed to the side of one of them along with Palethorpes own goods station and siding.

As a tester, I decided on starting with the small workers shed. I purchased the required materials which consisted of Wills brick sheets, Wills wood planking (for the pig sheds) and some Bulk Scene corrugated metal panels for the roof.


I marked out and cut the four walls then smoothed the edges with fine wet & dry.  Next I cut the door appature in one end and a small window in the front wall, again smoothing the edges with wet & dry. Following this I glued the four walls together using Wurth super glue. finally I glued the corrugated roof on.  I cut an oversize door out of the wood planking and glued it on the back of the opening then painted it with 'Palethorpes colour.(Crimson Lake)  


The window bars were made from 1mm strips of cut card glued on the inside of the frame.  Finally guttering was fitted made from half a cocktail stick and some copper wire. 


The building was now ready for painting and weathering so I used a weak wash of thinners and black around the bottoms of the walls and under the window and roof eaves and painted the roof sheets with a thin coat of black paint. To make the brickwork more realistic, I rubbed white tile grout all over the brickwork the immediately gently removed the excess off the brick faces with a damp cloth.

So that's it, my first attempt.  I am quite pleased with the end result and will now go on to try the pig sheds so until then
Don't bang 'em about
Blossom 

Saturday 25 January 2020

IN THE BEGINNING

High there, for many years now I had been planning a model of the Black Country landscape I remember from my youth.  Living in Tipton at Dudley Port and a stones throw from both the canal and both the old LMS and GWR railways , I spent many hours train spotting (steam) and touring the local canal system on my bike which both were still very active transporting goods to the hundreds of factories this area was famous for.

The canal at Dudley Port where I did my train spotting standing on that slab in front of the bridge girder.  The  LMS station of Dudley Port in front and the GWR rail passing under the canal at this point. My house was just out of the photo to the right.

An opportunity was arising with the forthcoming conversion of the loft into another bedroom for the grand kids and so the seeds have been set for my model giving me an area of roughly 10-0"  by 30'-0".

The main theme of the layout will be of industry, which of cause was my view of this area in the 1950's, and would be mainly canal based, as this is my main interest, and the railway would be secondary.  It will be based roughly on 1947 ish and will include a large double oval with various sidings to factories etc.  the canal will not represent a particular place but in fact be a compilation of various features of that area and include a canal tunnel, a set of three locks and many arms, wharves etc supplying the factories.

The layout will include, 
Coal yard (based on F Mitchards, Tipton)
Palethorpes (based on their Tipton model factory & pig storage)
Power station (based on Ocker Hill station)
Canal/rail interchange basin (based on Riders Green)
Steelworks (based on Bilston)
Gasworks (Typical)
Brick makers & marl-hole (based on Rattlechain brickwork's, Dudley Port)
Terraced housing (Typical)
Boat building dock (Typical)
Coal mine & narrow gauge cable way (based on 'The Ginnies')
Foundry (Typical)
Boiler Makers (Typical)
Engineering Co (Typical)
Chemical Co (based on Chance & Hunt, Oldbury)
A railway station (based on GWR Dudley Port low level)
and a collection of about a dozen other various industrial/factory buildings.
just to give an idea f what I will be trying to achieve here are a few photo's of the area's that will be included in the layout.
Mitchard's coal yard

Dudley Port low level Station

Factory locks

Joey boat George

Ocker Hill Power Station

Rattlechain Brick Works

Tipton Green Junction